Header & Footer Dialog
Click the Layout | Display | Header or the  button, or the Layout | Display | Footer command or the
  button to open the Header & Footer dialog. The dialog can also be opened by clicking the Header & Footer button in the Page Setup dialog. Set the header and footer text and alignment in the Header & Footer dialog. The header and footer are displayed in the plot window. By default the header and footer are not included in printed or exported output. To include the header/footer in printed and exported output, check the Include header/footer in export/print check box in the Options dialog General page.
|
|
|
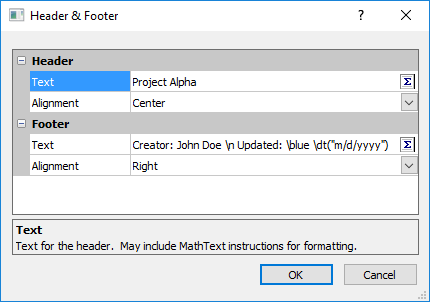
Set header and footer text and alignment in the Header & Footer dialog. |
Header and Footer Sections
The Header section and Footer section each contain fields for the Text and Alignment. Set the header properties in the Header section. Set the footer properties in the Footer section.
Text
Type the desired header or footer text in the Text field. Click the  button to open the Text Editor to insert math text instructions. You can also type math text instructions directly into the Text field without opening the Text Editor.
Linked text can be added to headers and footers by typing the linked text variables in the Text field or in the Text Editor. Note that linked text is only supported in the headers and footers.
- Type <<filename>> to display the full name and path for the file, for example "C:\Users\My Name\Documents\My File.srf"
- Type <<path>> to display the file path, for example "C:\Users\My Name\Documents"
- Type <<title>> to display the file name and extension, for example "My File.srf"
- Type <<date/time>> to display the current date and/or time, where date/time is any date/time format. The date and time update automatically each time the plot is changed or opened. For example, type <<ddd dd MMM YYYY HH:mm:ss>> to display the current date/time formatted as Wed 16 Nov 2016 14:59:24.
Alignment
Set the header or footer text alignment relative to the page in the Alignment field. Click the current option and select Left, Center, or Right from the list. Use the Text Editor to set the text justification to the left, center, or right.