Text and Font Properties
Click the Home | Insert | Text command to create new text. The Text Editor is used to initially create text. After the text is created, the text and font properties are displayed in the Properties window. Use the following options to change the text and font properties.
|
|
|
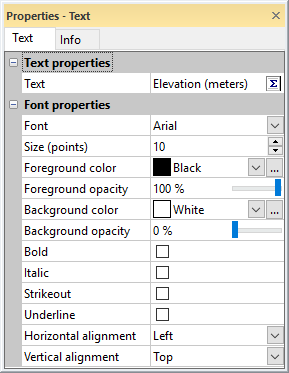
Edit text in the Text Properties section and font properties in the Font Properties section of the Properties window. |
Text Properties
The text can be edited in the Properties window or in the Text Editor. You can set the text that appears by highlighting the existing text next to Text field and typing the desired text for simple text strings.
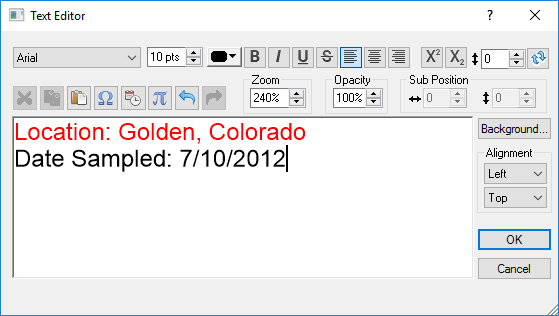
For complex text or multiple lines of text, click the  button to open the Text Editor. Enter text, edit text properties for individual characters, and add templates, symbols and timestamps with the Text Editor. The text you enter into the Text Editor is converted into math text instructions and written in the Text field. You can also type math text instructions directly into the Text field, if desired.
The file info (filepath, filename, fullpath) and date/time in linked text act as timestamps. When this text is created, it captures the file's information and the current date/time exactly as they are at that moment. To update or refresh this linked text to reflect any changes to the file or the current date/time, click the  button.
Font Properties
Text properties for the entire text block can be edited in the Properties window in the Font Properties section. Some options may not be available for all text, depending on the type of object selected. For example, when editing axis labels, the Alignment options are not available.
The changes made in the Font Properties section are considered the baseline text properties and are applied to each line of a text block. Changes made here override "normal" font options in the Text Editor. To have all text the same, click the button. Highlight all the text and set all the properties in the Text Editor , as desired. Then, the changes in the Font Properties section will apply to all text in the text object.
For example, suppose you type in the following in the Text Editor. After typing the text, you have highlighted the first line and made the color red and the font Cambria.
|
|
After clicking OK in the Text Editor, the following appears in the Text Properties section of the Properties window.
|
|

The two lines of text appear in the plot window as:
|
|

Now, in the Properties window in the Font Properties section, set the Font to "Times New Roman", the Foreground Color to Blue, and check the boxes next to Bold and Italic. Because the first line contains a font name and color, the font and color will not change for this line. But, the red text will be bold and italic. The text now appears as:
|
|

If the second line of text should remain without any text embellishments, such as bold or italics, in the Properties window, click before the word Date and add a \plain math text option. This does not control the font name and color, so they will still change. The Properties window would now appear as:
|
|

And, the text would appear in the plot window as:
|
|

Font
The Font is the font that is used for the text. To change the Font, click on the current font name. Select the desired font name from the Font list. Click the arrow button or select a font and use the ARROW keys on the keyboard to scroll through the Font list. The selected font is displayed in the Text Editor. The font files that are installed on your computer are displayed in the Font list. Surfer supports true type fonts. All text in a text block uses the same Font, unless a math text operation is applied or unless the font for some of the text has been specifically edited in the Text Editor.
Size (points)
Set the text size in the Size (points) field. Highlight the existing value and type a new value. Press ENTER on the keyboard to make the change. Or, click the ![]() buttons to increase or decrease the size. A Size (points) value between zero and 720 can be specified.
buttons to increase or decrease the size. A Size (points) value between zero and 720 can be specified.
Foreground and Background Color
Change the Foreground color and Background color of the text by selecting a new color from the color palette. The Foreground color controls the color of the text. The Background color controls the area behind the text. Create new colors by clicking the ![]() button to the right of the color name.
button to the right of the color name.
Foreground and Background Opacity
Change the Foreground opacity and Background opacity of the text by entering a value from 0% (completely transparent) to 100% (completely opaque). To change the opacity, highlight the existing value and type a new value. Press ENTER on the keyboard to make the change. Or, click and drag the  to change the opacity percentage.
Style
Check the boxes next to Bold, Italic, Strikeout, or Underline to apply a style to the text. Note that some typefaces, such as Symbol, do not support bold or italicized text.
-
Bold will increase the thickness of the text (i.e. example).
-
Italic will create
oblique slanted, sloped -
Strikeout will add a horizontal line through the center of the text (i.e. example).
-
Underline will add a horizontal line under the text (i.e. example).
Alignment
The Alignment controls the location of the text relative to the reference point. A reference point is the point clicked in the plot window when the crosshair cursor is placing the text on the screen. The text box is horizontally and vertically aligned relative to the reference point. The default position is that the reference point is at the upper left corner of the bounding box (left, top).
-
Left horizontally aligns the text box so that the reference point is to the left of the text box.
-
Center horizontally centers the text box on the reference point.
-
Right horizontally aligns the text box so that the reference point is to the right of the text box.
-
Top vertically aligns the text box so that the reference point is above the text box.
-
Baseline vertically aligns the text box so that the reference point is located at the base of the text. The baseline is the imaginary line along which characters are positioned as they are drawn. Descenders on characters are drawn below the baseline.
-
Bottom vertically aligns the text box so that the reference point is below the text box.
-
Center vertically centers the text box on the reference point.
Default Settings
Set default text properties through File | Options. In the Default Properties section, click Font to specify default properties.
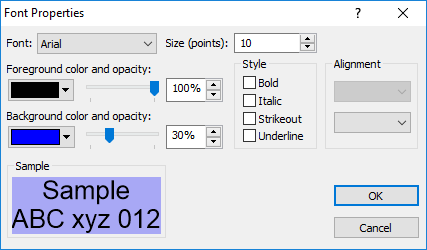
Font Properties Dialog
When changing the advanced label font property settings for a contour map, a Font Properties dialog will appear. The options are the same as described above in the Properties window. In addition, the Font Properties dialog has a Sample section where the font can be previewed.
|
|
|
Set the font properties for contour labels and grid node editor labels in the Font Properties dialog. |