Drillhole Manager
The Drillhole Manager lets you view and manage imported drillhole or borehole data. You can open the Drillhole Manager from either the standard 2D plot window or directly from the 3D view.
To open the Drillhole Manager from the 2D Plot window:
-
In the Contents window select the Drillhole layer, then in the Properties window select the General tab and in the View Data field click the View button.
-
In the Contents window right-click the Drillhole layer and select Open Drillhole Manager.
-
Click the Map Tools | Layer Tools | Open Drillhole Manager command in the ribbon.
To open the In the Contents window select the Drillhole layerfrom the 3D View window:
-
In the Contents window select the Drillhole object (located under the main Drillhole group). In the Properties window, select the General tab and in the View Data field click the View.
-
In the Contents window, right-click the Drillhole object and select Open Drillhole Manager from the context menu.
|
|
|
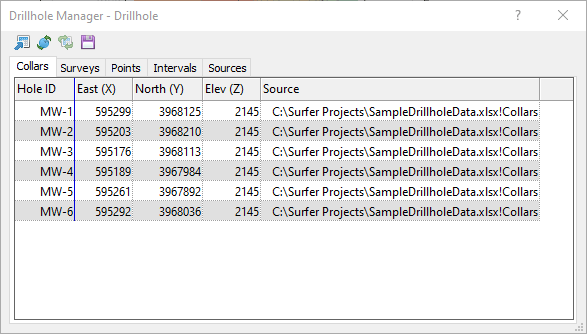
Example Drillhole Manager using SampleDrillholeData.xlsx |
View and Edit Data
Click the Collars, Surveys, Points, and Intervals tabs to view the imported data. Data can be edited in any of these tables, except in the Hole ID or Source fields. The changes will be saved in the Drillhole Manager, but the changes will not be saved to the source data files. The Sources table contains a list of data files imported into the Drillhole Manager and the date the data was last updated. This table cannot be edited.
Import and Reload Data
To import new data into the Drillhole Manager, click the  button. Select this option to add additional drillholes that have not yet been imported. Follow the same steps used to import the initial data.
To reload all of the data files imported into the Drillhole Manager, click the  button.
To reload one or more existing data sources, select the Sources tab, select one or more data sources, and then select the  button to reload only the selected sources. This is a good option to select when only one or a few data files have updated data, so all files do not have to be reloaded.
Save or Export Drillhole Data
To export or save data from the Drillhole Manager, click the  button. You can save a single table, a single XLSX file with multiple tables each in a separate sheet, or XYZC data to a tabular data file (such as CSV, DAT, TXT, or XLSX) to use later when creating 2D or 3D grids.
Select the type and options for the created data file in the Save Data dialog.
Create Grid
To create a 3D grid directly from the Drillhole Manager, click the  button. The Create Grid dialog will open with the drillhole data gridding options and variables displayed.
Tips and Hints
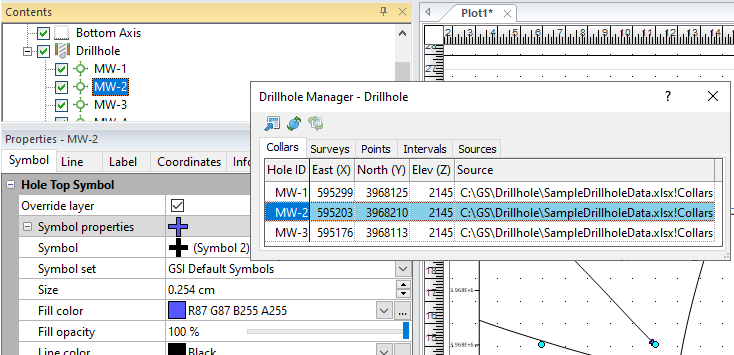
The Drillhole Manager can also be used to help locate a specific drillhole. When a row is selected in the Drillhole Manager, the drillhole for that Hole ID is selected in the Contents window and in the plot window. This is useful when working in the Drillhole Manager and you want to change individual drillhole attributes, such as its symbol.
For example, when the Drillhole Manager is open, click one of the Hole IDs (Hole ID MW-2 is selected in our sample data example below). The selected Hole ID will be selected on the map and in the Contents window, and its properties will be displayed in the Properties window. In the Properties window, click on the Symbol page, if that page is not already active. If you check the Override layer check box in the Hole Top Symbol section, you can define a new symbol for the selected drillhole. When you select another Hole ID in the Drillhole Manager, that drillhole will be selected on the map and its properties displayed in the Properties window.
|
|
|
Example Drillhole Manager showing a selected Hole ID and its symbol properties |