Assigning Coordinates to a Base (raster) Layer
When you import a georeferenced image as a base map, the image will be located according to its referenced coordinates. If your image is not georeferenced, you can assign coordinates to the image. You can redefine image coordinates when the image is part of a base layer, i.e. the image must be added using the Home | New Map | Base or Home | Add to Map | Layer | Base command (not the Home | Insert | Graphic command). By default, image files that are not georeferenced are assigned a coordinate system that corresponds to the rows and columns of the raster image. Under most circumstances the pixel coordinates or page coordinates do not match the coordinate systems used on other types of maps. In order to overlay this base map with other maps, you will need to redefine the coordinates for the image. After the image coordinates are redefined, the image base maps can be used in overlays with other types of maps. The image coordinate options are grayed unless the base map consists of a single image.
To change the base map image coordinates:
-
Click the Home | New Map | Base command. The Import dialog opens.
-
Select the image to create the base map.
-
Click Open.
-
In the Contents window, click on the base layer object to open the base layer properties in the Properties window.
|
|
|
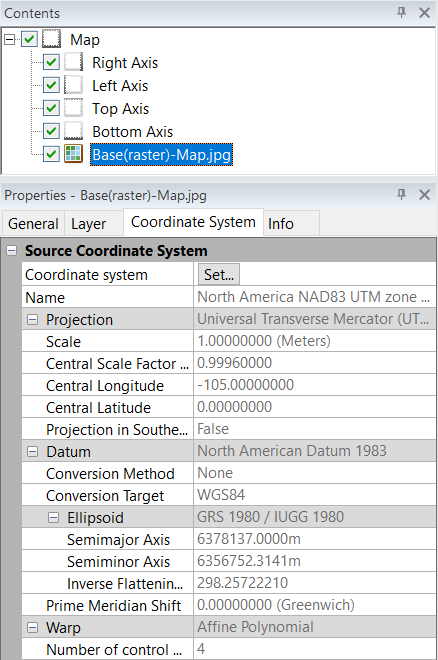
Click on the Base(raster) object to open the base map properties in the Properties window. |
-
You may wish to specify the coordinate system for the base layer under the following conditions:
-
You know the coordinate system you will be using to georeference the base layer, AND
-
You plan to overlay the base layer with layers in different coordinate systems, OR
-
You plan to transform the map to a different coordinate system,
If so, set the source coordinate system on the Coordinate System tab of the Properties window. Otherwise, leave the coordinate system set to Unreferenced local system.
-
Click the Map Tools | Layer Tools | Georeference Image command. The Georeference Image window is displayed.
-
Add control points to the image, specify the control point target coordinates, specify the warp method, and update the map with the Georeference Image window.
-
Verify the map looks correct in the Surfer window. Add, remove, or change control points or change the warp method if the map does not appear correct.
-
When you are satisfied with the georeferenced image, close the Georeference Image window.
The image is updated using the new coordinates.
Remarks
-
When first georeferencing an image, or when making large changes to a georeferenced image, it is likely you will have to adjust the Map object's Limits and Scale to see the image.
-
Click on the Map object in the Contents window.
-
Click on the Limits tab. Check the Use data limits box.
-
Click on the Scale tab. Change the scale properties, if necessary.
-
Image files load as base maps in pixel coordinates unless the image is referenced.
-
If you did not set the source coordinate system before georeferencing the image, you may wish to set the coordinate system. Set the base layer's coordinate system on the Coordinate System tab.
See Also
Changing Properties in a Base Map
Assigning a Coordinate System to a Map