Point Cloud Map
Point cloud maps display LiDAR data as points at XY locations. Color is assigned to the points by elevation, intensity, return number, or classification. The point cloud layer includes commands for modifying, classifying, and exporting points. Point cloud layers are displayed in the 3D View as three-dimensional points. LiDAR data can be combined from multiple files and filtered with various criteria when creating a point cloud map. The point cloud layer requires one or more LAS/LAZ LiDAR data files to be selected for the input files.
|
|
|
|
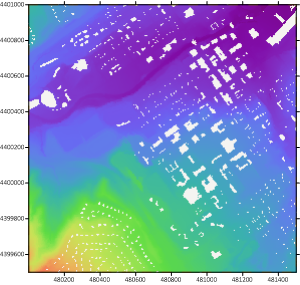
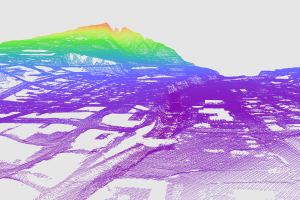
This example shows a point cloud layer in the plot window (left) and 3D view (right). The colormap is applied by elevation. |
|
Creating a Point Cloud Map
To create a point cloud map:
- Click the Home | New Map | Specialty | Point Cloud command or the
 button.
 - Select one or more LiDAR files in the Open dialog and click Open.
- Add or remove files, set the coordinate system, and apply filters to the points in the Import Points dialog, if desired, and click OK.
The map is automatically created with reasonable defaults. The point cloud layer name includes the input file name in the Contents window, e.g. Point Cloud - myData.las . If the point cloud layer consists of multiple input files, a "+" is appended to the layer name, e.g. Point Cloud - myData.las+ .
Editing an Existing Point Cloud Map
To change the features of the point cloud map, open the point cloud map properties by clicking on the point cloud map in the plot window or clicking on the point cloud layer name in the Contents window. The properties are displayed in the Properties window.
To classify, modify, or export points or grids, open the Point Cloud ribbon tab by clicking the point cloud map in the plot window or clicking the point cloud layer name in the Contents window. The Point Cloud tab is added to the ribbon and automatically selected.
Adding a Map Layer
When point cloud maps are created, they are independent of other maps in the plot window. For example, creating a point cloud map while a contour map is present in the plot window yields two separate maps, each with its own set of axes and scaling parameters. To create a single map with the point cloud map data points on the contour map, select both maps by clicking the Home | Selection | Select All command. Overlay the maps using the Overlay Maps command.
Alternatively, you can add the point cloud map directly to the existing contour map by creating the point cloud map using the Home | Add to Map | Layer | Point Cloud command. This automatically adds the point cloud map to the contour map axes.
Another alternative, is to create both maps using the Home | New Map commands. Then, select one map and drag the map layer to the other map object. This is equivalent to using the Overlay Maps command to overlay maps. For example, create a contour map with the Home | New Map | Contour command. Create the point cloud map using the Home | New Map | Specialty | Point Cloud command. This creates two separate maps. Click on the point cloud layer in the Contents window, hold down the left mouse button, and drag the point cloud layer into the contour map. A single map with two map layers, using one set of axes and scaling parameters is created.
Point cloud maps cannot be added as a map layer to 3D wireframe maps, but a point cloud map can be added to any other map layer, including 3D surface maps.
Saving a Point Cloud Map
Surfer embeds most grid and vector data in the Surfer SRF file. However, Surfer does not embed the point cloud data in the SRF file. Surfer saves a path to the source data, the Import Points options, and point cloud layer settings. When sharing an SRF file with a point cloud layer with another user, provide the user with the LAS source data files. Consider storing LAS source data in a network location if you often share SRF files with point cloud layers.
When opening an SRF file that includes a point cloud layer, Surfer first checks the saved file path to locate the data. If the data is not found in the same path with the same name, Surfer then checks paths relative to the SRF file location for the LAS source data. If the source data is still not found, the Import Points dialog is displayed with missing data files highlighted. Click Update File Path in the Import Points dialog to locate the missing source data files.
When opening an SRF file with a point cloud layer, the point cloud data loading progress is displayed in place of the layer until the source data has finished loading. You can begin working on your map while the point cloud data loads.
Point Cloud Layer Properties
The point cloud layer properties contains the following pages:
Map Properties
The map properties contains the following pages:

